0x1.背景介绍. 内网渗透相信大家都搞过,怎么把自己带进内网里面,方法也是多种多样,比较流行的有:
- reGeorg
- socks5
- meterpreter
- ssh -D 动态socks5 转发 (要求root权限)
等等…… , 方法挺多的,但是用这些代理出来之后,如果不进行任何处理,就是仅仅支持socks代理,让浏览器代理上网,对于不支持socks代理的软件,how to do …..?? 就算软件支持socks5代理,一个软件一个软件设代理,我想即使不是处女座也会受不了的,所以我们需要一个更好的解决方案. 0x2.尝试过的解决方案
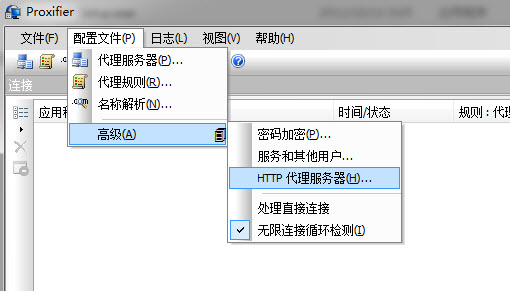
如果你是windows, proxifier就是你的终极解决方案,啥是proxifier,百度一下呗
软件像这样,来贴个图
啥?不会用,当然百度啦……
- 如果你是像我这样的linux爱好者,就继续看下去吧.
不得不说proxychains是可以用的,而且用起来挺好,但是每次运行一个软件都需要在前面加一个proxychains,有时候也会觉得很麻烦,
而且还有一些软件不吃proxychains的那一套,做不上代理,这就需要下面的这个解决方案了.
0x3.我认为的终极解决方案 iptables + redsocks
一.首先先下载编译redsocks
git clone https://github.com/darkk/redsocks
cd redsocks
make   #编译一下,此目录下的redsocks 就是可执行程序
需要注意的是,redsocks依赖libevent,如果没有安装的话,make的时候将会报错: ubuntu/debain系统通过以下命令安装:
sudo apt-get install libevent-dev Redhat/Centos通过以下命令安装
``
sudo yum install libevent-dev
二,运行你的shadowsocks的客户端,默认大家都会用啊,
root@wonderkun-pc:~/Desktop/github/redsocks$ sslocal -s ip -k password -p remote_port
2016-05-16 21:18:09 INFO loading libcrypto from libcrypto.so.1.0.2 2016-05-16 21:18:09 INFO starting local at 127.0.0.1:1080
三.配置redsocks. cp redsocks.conf.example redsocks.conf
对redsocks.conf 做如下修改:(修改的地方已经标注)
```bash
base {
// debug: connection progress
log_debug = on;

// info: start and end of client session
log_info = on;

/* possible `log' values are:
* stderr
* "file:/path/to/file"
* syslog:FACILITY facility is any of "daemon", "local0"..."local7"
*/
log = stderr;
// log = "file:/path/to/file";
// log = "syslog:local7";

// detach from console
daemon = off;

/* Change uid, gid and root directory, these options require root
* privilegies on startup.
* Note, your chroot may requre /etc/localtime if you write log to syslog.
* Log is opened before chroot & uid changing.
* Debian, Ubuntu and some other distributions use `nogroup` instead of
* `nobody`, so change it according to your system if you want redsocks
* to drop root privileges.
*/
// user = nobody;
// group = nobody;
// chroot = "/var/chroot";

/* possible `redirector' values are:
* iptables - for Linux
* ipf - for FreeBSD
* pf - for OpenBSD
* generic - some generic redirector that MAY work
*/
redirector = iptables;

/* Override per-socket values for TCP_KEEPIDLE, TCP_KEEPCNT,
* and TCP_KEEPINTVL. see man 7 tcp for details.
* `redsocks' relies on SO_KEEPALIVE option heavily. */
//tcp_keepalive_time = 0;
//tcp_keepalive_probes = 0;
//tcp_keepalive_intvl = 0;

// Every `redsocks` connection needs two file descriptors for sockets.
// If `splice` is enabled, it also needs four file descriptors for
// pipes. `redudp` is not accounted at the moment. When max number of
// connection is reached, redsocks tries to close idle connections. If
// there are no idle connections, it stops accept()'ing new
// connections, although kernel continues to fill listenq.

// Set maximum number of open file descriptors (also known as `ulimit -n`).
// 0 -- do not modify startup limit (default)
// rlimit_nofile = 0;

// Set maximum number of served connections. Default is to deduce safe
// limit from `splice` setting and RLIMIT_NOFILE.
// redsocks_conn_max = 0;

// Close connections idle for N seconds when/if connection count
// limit is hit.
// 0 -- do not close idle connections
// 7440 -- 2 hours 4 minutes, see RFC 5382 (default)
// connpres_idle_timeout = 7440;

// `max_accept_backoff` is a delay in milliseconds to retry `accept()`
// after failure (e.g. due to lack of file descriptors). It's just a
// safety net for misconfigured `redsocks_conn_max`, you should tune
// redsocks_conn_max if accept backoff happens.
// max_accept_backoff = 60000;
}

redsocks {
/* `local_ip' defaults to 127.0.0.1 for security reasons,
* use 0.0.0.0 if you want to listen on every interface.
* `local_*' are used as port to redirect to.
*/
local_ip = 127.0.0.1;
local_port = 12345;    #这个端口默认就行,只要跟你以后iptables,重定向的端口一样就ok

// listen() queue length. Default value is SOMAXCONN and it should be
// good enough for most of us.
// listenq = 128; // SOMAXCONN equals 128 on my Linux box.

// Enable or disable faster data pump based on splice(2) syscall.
// Default value depends on your kernel version, true for 2.6.27.13+
// splice = false;

// `ip' and `port' are IP and tcp-port of proxy-server
// You can also use hostname instead of IP, only one (random)
// address of multihomed host will be used.
ip = 127.0.0.1;    #如果你是在本地开的shadowsocks客户端,地址就是127.0.0.1
port = 1080;        #shadowsocks  客户端的端口,默认就是1080

// known types: socks4, socks5, http-connect, http-relay
type = socks5;

// login = "foobar";
// password = "baz";

// known ways to disclose client IP to the proxy:
// false -- disclose nothing
// http-connect supports:
// X-Forwarded-For -- X-Forwarded-For: IP
// Forwarded_ip -- Forwarded: for=IP # see RFC7239
// Forwarded_ipport -- Forwarded: for="IP:port" # see RFC7239
// disclose_src = false;

// various ways to handle proxy failure
// close -- just close connection (default)
// forward_http_err -- forward HTTP error page from proxy as-is
// on_proxy_fail = close;
}

redudp {
// `local_ip' should not be 0.0.0.0 as it's also used for outgoing
// packets that are sent as replies - and it should be fixed
// if we want NAT to work properly.
local_ip = 127.0.0.1;
local_port = 10053;

// `ip' and `port' of socks5 proxy server.
ip = 10.0.0.1;
port = 1080;
login = username;
password = pazzw0rd;

// redsocks knows about two options while redirecting UDP packets at
// linux: TPROXY and REDIRECT. TPROXY requires more complex routing
// configuration and fresh kernel (>= 2.6.37 according to squid
// developers[1]) but has hack-free way to get original destination
// address, REDIRECT is easier to configure, but requires `dest_ip` and
// `dest_port` to be set, limiting packet redirection to single
// destination.
// [1] http://wiki.squid-cache.org/Features/Tproxy4
dest_ip = 8.8.8.8;
dest_port = 53;

udp_timeout = 30;
udp_timeout_stream = 180;
}

dnstc {
// fake and really dumb DNS server that returns "truncated answer" to
// every query via UDP, RFC-compliant resolver should repeat same query
// via TCP in this case.
local_ip = 127.0.0.1;
local_port = 5300;
}

// you can add more `redsocks' and `redudp' sections if you need.
修改完成之后,直接./redsocks 就跑起来了
三.最重要的来了,配置iptables 我写了一个脚本附带注释,方便不太懂iptables的筒子们来使用
#file name iptables.sh
if [ $# -lt 1 ]
#不重定向目的地址为服务器的包
then
echo -en "\n"
echo "Iptables redirect script to support global proxy on ss for linux ... "
echo -en "\n"
echo "Usage : ${0} action [options]"
echo "Example:"
echo -en "\n"
echo "${0} start server_ip To start global proxy"
echo "${0} stop To stop global proxy"
echo -en "\n"
else
if [ ${1} == 'stop' ]
then
echo "stoping the Iptables redirect script ..."
sudo iptables -t nat -F
fi
if [ ${1} == 'start' ]
then
if [ $# -lt 2 ]
then
echo -e "\033[49;31mPlease input the server_ip ...\033[0m"
else
##不重定向目的地址为服务器的包
sudo iptables -t nat -A OUTPUT -d ${2} -j RETURN #请用你的shadowsocks服务器的地址替换$SERVER_IP
# #不重定向私有地址的流量
sudo iptables -t nat -A OUTPUT -d 10.0.0.0/8 -j RETURN
sudo iptables -t nat -A OUTPUT -d 172.16.0.0/12 -j RETURN
sudo iptables -t nat -A OUTPUT -d 192.168.0.0/16 -j RETURN
#不重定向保留地址的流量,这一步很重要
sudo iptables -t nat -A OUTPUT -d 127.0.0.0/8 -j RETURN
# #重定向所有不满足以上条件的流量到redsocks监听的12345端口
sudo iptables -t nat -A OUTPUT -p tcp -j REDIRECT --to-ports 12345 #12345是你的redsocks运行的端口,请根据你的情况替换它
fi
fi
fi
使用方法:
./iptables.sh   start  ip     #ip是你的shadowsocks服务器的ip,开启全局代理
./iiptables.sh  stop   #结束全局代理,这句是不用全局代理之后,必须运行的,否则是没有办法上网的
0x4.个人使用测试
因为ip这东西也是个人的隐私,所以就不贴图了 OK,好了